In topic two, we learned about microscopy. Learning outcomes for this topic are able to identify the parts of a basic microscope, able to describe the principle of light, phase-contrast, fluorescence and electron microscope, able to select suitable microscope for relevant usage and lastly able to recognize images produced from different microscope. There were four types of microscope which are optical, electron, scanning probe and scanning acoustic microscope . For optical microscope include dark field, bright field, fluorescence microscopy and phase contrast microscopy. Dark field and bright field microscope we often used in laboratory. Fluorescence microscopy are the microscope that have monitor and computer attached on it. For electron microscope included scanning electron microscope, transmission electron microscope and environmental scanning electron microscope. Then for scanning probe included atomic force, scanning tunneling and scanning near-field optical microscope.
 |
| Electron microscope |
 |
| Scanning probe microscope |
 |
| Optical microscope |
Then, we learned details about the light microscope. Variety of common light microscope which were bright-field, dark-field, phase contrast and fluorescence. All are compound microscopes ( the magnified image formed by the objective lens is further enlarged by one or more additional lenses for example ocular lens. the bright-field microscope are ordinary microscope and dark image against brighter background while for the dark-field microscope, bright image against darker background.
 |
| Light field vs dark field |
After that, Dr wan explained to us briefly about microscope. Group with 4 boys and 2 girls which consists of Radin, Malik, Daus, Imran, Faridah and Fatin were given a task to find out an interesting way to learn about this topic. They prepared a a slide about microscopy that interesting and unique way. I couldn't remember about the slide but I only remembered about the meteor, ironman and thats all. Dr Wan really supportive to them for what they have done to make this topic interesting.
 |
The parts of a basic microscope
|
Besides, we also learned how to focus our microscope. First thing we need to place the slide on the stage, in between the stage clips. Make sure the objectives lens is at the lowest power. By looking at the side, adjust the lowest power objective lens down as close to the specimen as possible without touching it. Then, look through the eyepiece lens and focus upward only until the image is sharp (use coarse adjustment knob) and lastly change to higher power objective lens and readjust with fine adjustment knob. We will doing this for our practical microbiology in semester 3. Resolution is the resolving power which is ability of the lenses to distinguish fine detail and structure. The shorter the wavelength, the greater is the resolution. Refractive index is measure of the light bending ability of a medium. We used oil immersion because to improve the resolution power by focusing more lights to the specimen. Oil immersion also to be used at high objective power (100x).
Then, we go through detail about the bright-field microscope. These are ordinary microscope that we often used. It produce dark image against brighter background and for enhanced observation with bright-field microscope, kill and stain the cells.
 |
Gram positive and gram negative

 |
After that, we need to find out terms which was on the lecture notes. Simple stains can be used to determine cell shape, size and arrangement. Differential staining is a procedure that takes advantage of differences in the physical and chemical properties of different groups of bacteria. It allows us to differentiate between different kinds of bacterial cells or different parts of a bacterial cell. Acid fast stains or the other name called Ziehl Neelsen is for bacterium and it is very specific. Lastly for special stains which include capsule, for staining bacteria that has capsule, endospore for bacteria that can produce spore such as Bacillus antrachis and Clostridium at unfavorable condition.
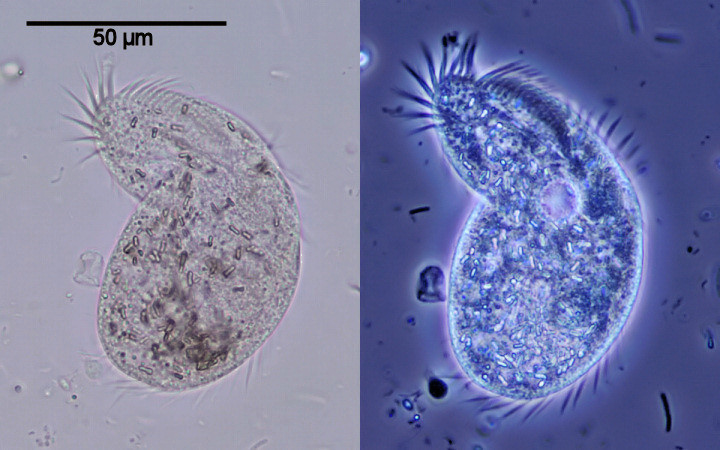
Next, we continued about the dark-field microscope. Usually to observe live specimens which cannot be stained and uses only an opaque disk which blocks light that would enter the objective lens and produce bright image against darker background. Phase contrast microscope permits detailed examination of internal structures to view living cell processes for example cell division and phagocytosis. Phase contrast microscopy light coming in is phase and when it strikes the image is it thrown out phase creating more resolution. The applications of phase contrast microscope are microbial motility, determining shape of living cells and detecting bacteria components such as endospores and inclusion bodies.
 |
| Bacteria in phase contrast |
 |
Phase contract
|
For fluorescence microscope, it produce image from light that passes through a specimen. Specimen tagged or naturally fluorescing against dark background. The image itself emits light for example after excitation with fluorescence stain called fluorochromes, or labeled with fluorochrome-labeled probes or antibodies. Specimen exposed to uv, violet or blue light.
 |
| L. plantarum strain detected by fluorescence microscopy |
 |
E.coli strain detected by fluorescence microscopy
|
Next, electron microscopy is resolution limit of bet light microscope (0.2 micrometer). Light microscope is for general observation of bacteria (size 1-2 micrometer), cannot see virus or internal structure of bacteria. Electron microscope much greater resolution (0.5 nanometer) and magnification over 100,000 times. There are two types which are transmission electron microscope for analyzing internal structures and scanning electron microscope for analyzing surface structures or 3D structure outer layer.
 |
Transmission electron microscope
|
 |
| Scanning electron microscope |
Atomic force (Scanning probe) microscopy is the eye of Nanotechnology: resolves features as small as an atolic lattice in the real space. It used electrons and application of small voltage to the specimen an allow observation and manipulation at molecular atomic level. For scanning acoustic microscopy it used sound waves and imaging system calculates and color codes speed of sound (SOS). After learned this topic, I knew that there were many types of microscope that useful for industrial application. Before this, I only knew about the simple microscope that often used for the experiment in laboratory. Then, we proceed to individual quiz and group guiz about microscopy topic. This was really fun because while we were answered the quiz we try to refresh ad memorize what we have learned on that day.
We were required to do the mind map regarding for the next topic which is about prokaryotic cells. Dr Wan gave us many mind map tools that we can use to do our mind map. There were many tools that I even cant have decision which mind map tools is the best. So I did signed up everything and all account that Dr Wan provided to us. It really takes a long time but I have to do it because to choose the best mind map tools. Lastly, I decided to choose the mindomo which is quite friendly user and easy to use for newbie like me. It was really challenging when do the mind map because it was the first time I used all this tools. It takes half day to finish it and I also skip my dinner because my passionate to settle up this before tomorrow on that day and I wanted to make it really perfect. But I knew this mind map is really useful for me because it not only just an assignment. Then after finish it we all need to submit it in Putrablast. In the class, we do a lot of activities. We do the quiz about prokaryote in quizlet.com. We also need to re-do the mind map at the whiteboard by taking turns to write the information in front. And as usual, before the class end, Dr Wan told us to be ready for our next class on Monday.
Amazing! :)
ReplyDeleteSuperbly written article, if only all bloggers offered the same content as you, the internet would be a far better place..
ReplyDeleteChandeliers